[Top 3] Breath of the Wild Best Armor Sets And How To Get Them
Updated: 01 Jun 2019 4:24 am
Because we all need a bit of hand-holding every now and then.
What Are The Best BoTW Armors?
It's always great and grand to be prepared for everything that comes your way: from the beasts of the deep abyss to the expedition far from, you're going to need a bit more than a t-shirt or whatever leather loincloths you've got to make your journey count.
Armor. The extra health bar to our vitality, the debuffs of kinetic force, and et cetera. Breath of the Wild has some serious challenges that come forth your way...Even with a stack of food that you can eat at anytime during a battle, it's best to say that you don't want to be eating it up constantly when you're in the closest fight of your life. We're here to tell you all about the armor, and which ones to get for what you might like.
3. The Rubber Set
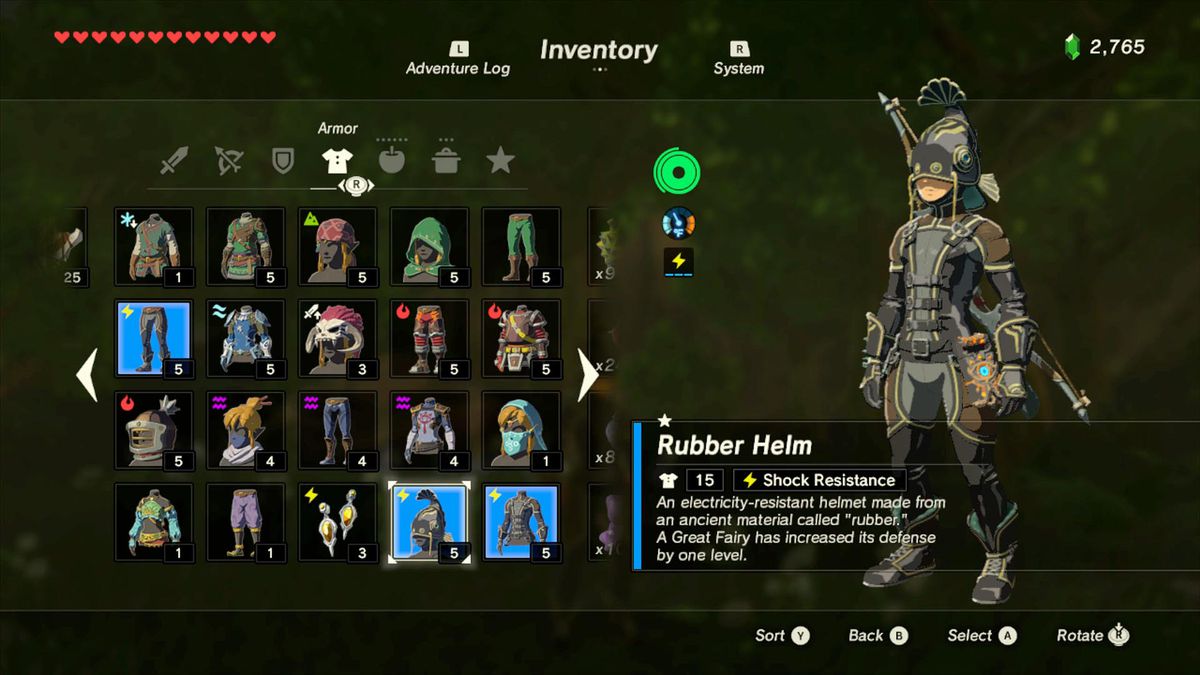
Because who cares if you get struck by lightning when you have a catfish on your head?
This set makes dealing with electric enemies far less annoying and dangerous and I highly recommend getting this set before attempting to visit Zora’s Domain or the Gerudo Desert. By completing this set and getting it upgraded twice, Link is provided with immunity to shocks. One piece can be unlocked via a quest reward and the other two are found in shrines.
Two pieces of the set are close together in the Faron region, which makes up the southeastern section of the map. From the Great Plateau, glide down toward Lake Hylia and follow the bridge south across the lake. The Rubber Helm can be found at Lakeside Stable. Speak to Cima, the girl tending the horses. She expresses concern at the amount of lightning that strikes the stable. You will receive the Thunder Magnet quest from her. Climb up to the top of the stable to find and remove the axe that was causing the problem. Get down off the roof and speak to Cima again. She will reward you with the helm.
The Rubber Tights can be found in a nearby shrine. From Lakeside Stable, cross Floria Bridge and climb up to Calora Lake. You should hear Kass playing his accordion. Speak with him to hear a song referring to the big mound of rocks nearby. The song gives you the Song of Storms quest and hints at what needs to be done. Climb to the top of the rock and drop any piece of metal equipment, then stand back and wait. After a few seconds, light.ing will strike the rock and reveal the Toh Yasha shrine. There are no puzzles in this shrine, just walk in and open the chest to claim the Rubber Tights.
The last piece, the Rubber Armor, is located between the Tabantha Bridge Stable and the Ridgeland Tower. If you can’t fast travel to these locations yet, they are northeast of the Great Plateau and east of the Castle Town ruins. When you walk into the marshy area between the stable and the tower, you will automatically receive the Trial of Thunder shrine quest. To complete this quest, you will need to find the four colored orbs in the area and place them in the correct place. There is a platform in the center of the area. The orbs must be placed in front of the statue with the correct color marking on it. Some of the orbs are already on the platform and will only need to be moved to the right spot. The orbs that are located off that platform will need to be knocked onto it with stasis before they can be placed. Once the orbs are in the correct spots Qukah Nata will appear. Enter the shrine to claim the Rubber Armor.
Now that you have all three pieces, they need to be upgraded if you want shock immunity. For the first upgrade, each piece will need three pieces of Yellow Chuchu Jelly. The second upgrade will require five pieces of Yellow Chuchu Jelly and five Voltfruit each. After two upgrades, your rubber armor set will have complete shock immunity. If you want to continue upgrading, you will need to gather five Zapshrooms and Five Yellow Lizalfos Tails for the third upgrade, then ten Yellow Lizalfos Tails and ten Topazes for the fourth. If you have some time to kill, go hang around a stormy area and watch enemies getting electrocuted by lightning when they wave their metal weapons at you.
2. The Climbing Set
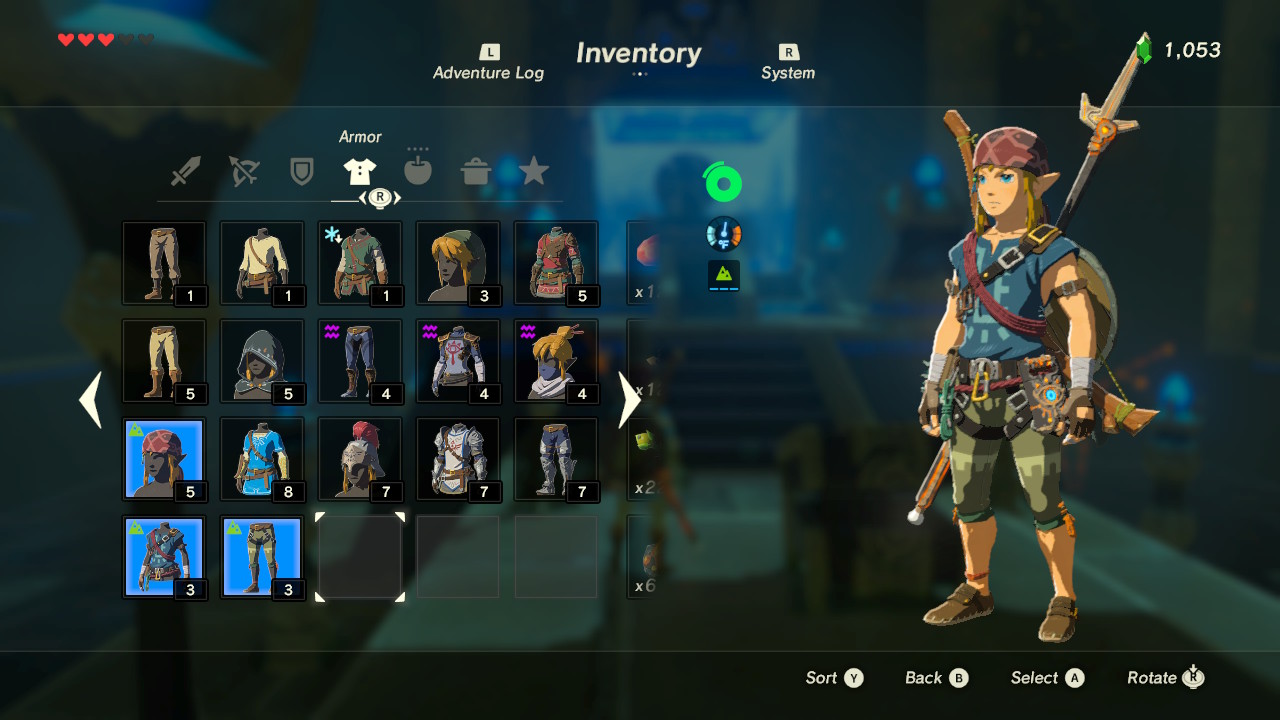
Do you even climb, bro?
In Breath of the Wild, you can climb pretty much anything, so a set of armor that boosts your climbing speed comes in handy. Each part of this set boosts your climbing speed and will reduce the stamina used by jumping while climbing once upgraded twice.
The Climber’s Bandana is located in the Ree Dahee shrine near Dueling Peaks. This shrine involves operating floor switches to control the tilt of platforms and these platforms hold shrine orbs that need to be dropped into the correct place. The first switch simply needs to be stood on. The next set of switches operates a pair of platforms. These switches must be stepped on and off at the right times to roll the orb to the right spot. The last switch controls a single platform again, but you must step off once the orb has gained enough momentum to cross a gap and land in the right place. The treasure chest containing the bandana is nearby. There are metal barrels located below the orb. Use magnesis to push down the switch, then run up the platform to collect the bandana.
The Climbing Gear is located within the Chaas Queta Shrine on Tenoko Island. To reach the island, you can either glide from Cape Cales or the roof of the Hateno Ancient Tech lab. The island is located in the Necluda Sea between these two locations. It will take one stamina wheel to glide from Cape Cales and between two and three to glide from the Hateno Ancient Tech Lab. The shrine contains a combat trial soomplete the major test of strength (a Guardian Scout IV), and go through the door to claim the Climbing Gear.
To get the Climber’s Boots, warp or travel to Hateno village. On the dock behind the dye shop, you will find a woman named Clavia. Speak to her to receive the quest, The Secret of the Cedars. The quest references the cedar trees standing on top of the mountains in the nearby Lanayru Range. If you climb to the cedars in the mountains, you canhead toward the sea from the easternmost tree. You can also climb up and to the west from Afromsia Coast. No matter which way you choose to get there, Tahno O'ah shrine rests behind a bombable wall on a wide ledge with a clump of trees on it. The clump of trees can be seen from the map, so you can use that as a reference. Once you find it, simply enter the shrine and open the chest to receive the boots.
To upgrade this set the first time, you will need three Keese Wings and three Rushrooms for each piece. The second upgrade requires five Electric Keese Wings and five Hightail Lizards. After you upgrade the set twice, you will have increased climbing speed and the additional climbing jump stamina reduction. If you want to completely upgrade the climbing set, you will need to find five Ice Keese Wings and ten Hot Footed Frogs for each piece to get upgrade three. Upgrade four will take Five Fire Keese wings and fifteen Swift Violets for each piece of the set. Enjoy fast climbing and jumping all over the place using extremely little stamina, oh impatient one.
1. The Barbarian Set
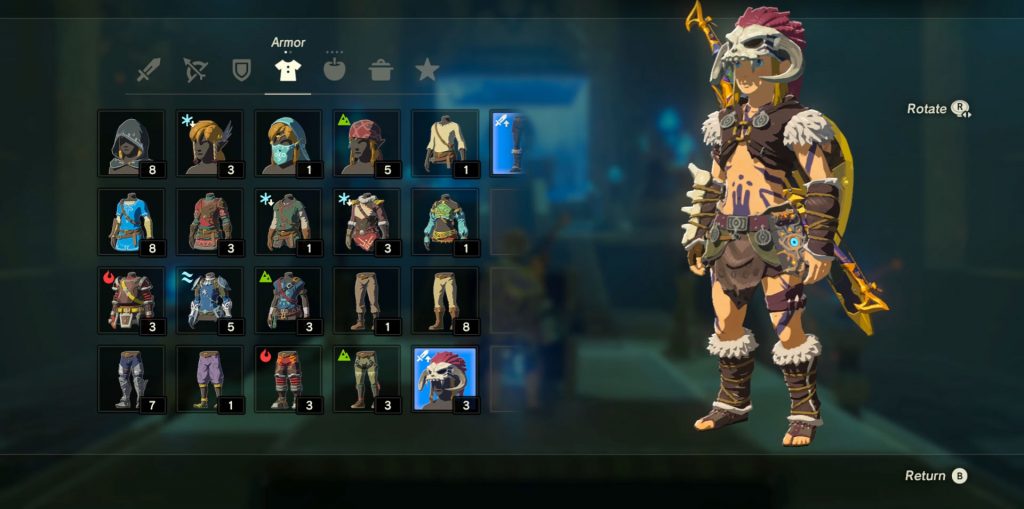
Make mincemeat out of your enemies and look fabulous doing it.
The major draw of the Barbarian Set is the attack boost. The set doesn’t provide much defense, which makes sense as Link is running around in a loin cloth and a skull, but the attack bonus more than makes up for it. The three pieces of this set are received as rewards in the game’s three labyrinths. The labyrinths are located in Akkala, Hebra, and the Gerudo Desert.
Lomei Labyrinth Island, located in Akkala, contains the Barbarian Helm. Glide to the island from the Akkala Ancient Tech lab. When you land, you will gain the Lomei Labyrinth Island shrine quest. Navigate the maze to find Tu Ka’loh Shrine. The helm is located inside the shrine in a chest.
South Lomei Labyrinth is located in the Gerudo Desert and hides the Barbarian Armor. To reach it, glide southeast from the Wasteland Tower. Once you land you will gain the South Lomei Labyrinth shrine quest. Navigate through the maze to find Dila Maag shrine. The armor is once again located in a chest within the shrine.
North Lomei Labyrinth is located in the Hebra region and contains the Barbarian Leg Wraps. To reach it, warp or travel to the Snowfield stable. From there, travel around the foot of Mount Drena (I recommend using a horse) until you get to the labyrinth. There is a lynel on the way, so keep an eye out for it if you want to avoid it. Once you enter, you will receive the North Lomei Labyrinth shrine quest. Complete the final maze to reach Qaza Tokki shrine and the chest containing the leg wraps.
To upgrade this set you will have to fight some Lynels. The first upgrade will require one Lynel Horn for each piece in the set. Upgrade number two will take three Lynel Horns and two Lynel Hooves for each piece. Two upgrades will get you the Barbarian Set’s bonus: reduced stamina cost for charge attacks. For a complete upgrade, you will need to do some more Lynel hunting. Four Lynel Hooves and one Lynel Guts for each piece will get you upgrade number three. Two Lynel Guts and one Shard of Dinraal’s Horn will give each piece in the set its fourth and final upgrade. The completed set will earn you ridiculous attack strength and the ability to perform more charge attacks. On top of that, this set will be a lot of fun to complete if you enjoy navigating the labyrinths as much as I did. The labyrinths also come with the added bonus of treasure hunting. Have fun!
That completes my list of the top three armor sets in Breath of the Wild. However, there is one more item that I would like to add on as a bonus: Majora’s Mask, available as part of the first DLC pack. Once you purchase the DLC season pass (19.99), you can find the mask buried near the Kolomo Garrison Ruins once you pick up the quest by reading the book inside the Outpost Ruins. The mask causes most normal enemies to follow you around instead of attacking you. It saves a lot of travel time and can lead to some pretty hilarious selfies.
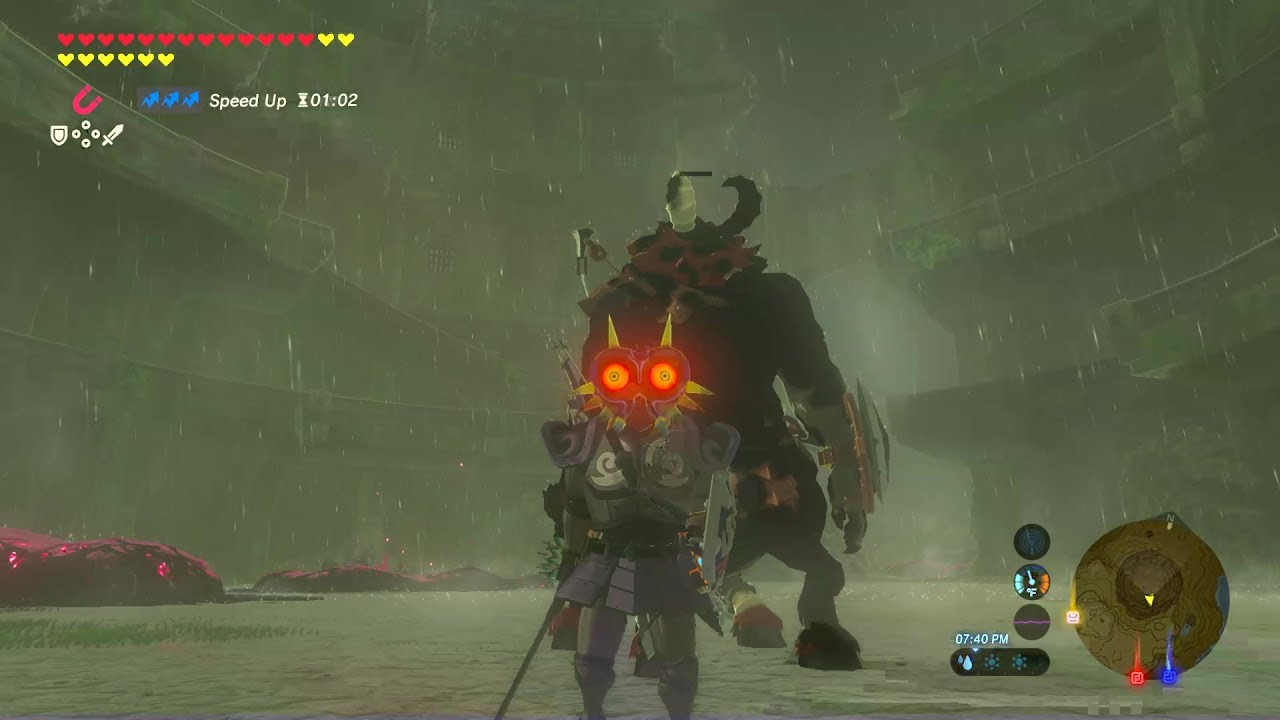
Didn’t I meet you in Villainry 101? I never forget a face.

No comments:
Post a Comment